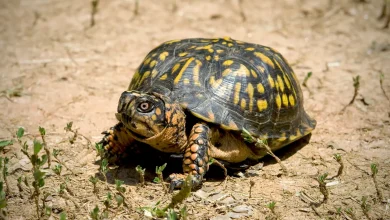
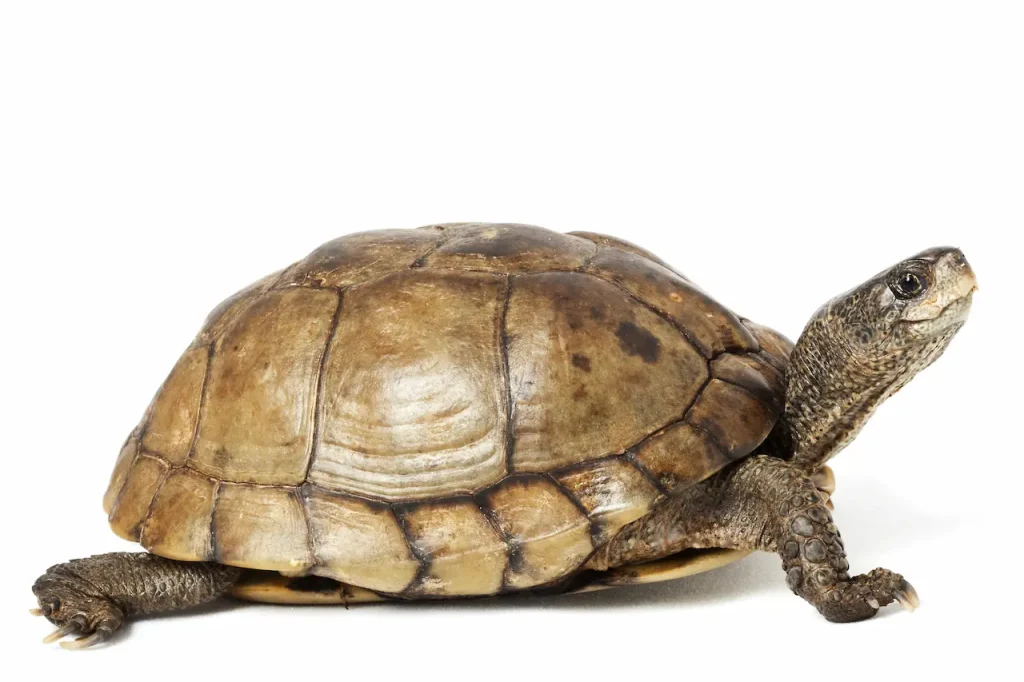
The Coahuilan Box Turtle is a species of box turtle found in Cuatro Ciénegas in Coahuila, Mexico.
- Terrapene Coahuila, Schmidt and Owens, 1944
It is sometimes referred to as the Aquatic Box Turtle. The Coahuilan Box Turtle is critically endangered. It is listed among the 25 most endangered species of turtles on the planet. An estimated 2,000 Coahuilan Turtles are said to be left in the wild at the moment. The population was estimated to consist of about 2,500 adult turtles at the last “official” estimation. That estimation was based on field studies during 2002-2003. (Howeth in litt. 26 Feb 2007). That is down an estimated 70% from estimations done in the sixties. It is however hard to know the exact number since Terrapene Coahuila is an aquatic species.
Table of Contents
Terrapene Coahuila Distribution
Terrapene Coahuila has a very limited distribution and is endemic to the Cuatro Ciénegas in Coahuila, Mexico. There are several distinct pockets of turtles spread over an area of less than 800 km². Each species is believed to have a home range with a diameter as low as 25.6 m (Brown 1974). Some studies suggest that they may be doomed to die out in the upcoming years if nothing is done to prevent it. One of the biggest threats to the species is habitat destruction caused by farming efforts in the area. A Large problem is horses grazing in the area and eating the same grass as the turtles rely on for food. Another large problem is that farming and irrigation is causing the already shallow water levels to sink and leave large areas completely dry.
There are strict laws that protect the wild Coahuilan box turtles in their natural habitat. The Coahuilan box turtle population seems to number in the 133-156 individuals/ha range in areas with healthy populations. This assumption is however made from studies made in the late sixties and most, if not all populations have today a lower population density than that.
Turtles have been known to leave their home range and travel across the desert floor during the rainy season.
Coahuilan Box Turtle Habitat
As their unofficial name would imply, the aquatic box turtle is indeed an aquatic creature. It is the only aquatic species of Terapenne box turtle. Despite this, it is closely related to the common box turtle, Terrapene Carolina. This has led scientists to believe that this species does not have an aquatic heritage but rather developed into an aquatic species to adapt to the desert-spring ecosystem in the Cuatro Ciénegas area. (Feldman and Parham 2002, Stephens and Wiens 2003)
It spends roughly 90% of its time in the water, enough time that algae will commonly grow on the exterior of its shells. They spend their time in marshlands, amongst tall grass and brush, and a lot of water. They strongly prefer areas with shallow water, mud bottom and dense vegetation. The vegetation found in the area is primarily Chara spp, Eleocharis rostellata, and Scirpus olneyi. (Brown 1974)
They dig into mud to cool themselves down, as well as seek shade in grass or brush.
The species is active all year round but can hibernate on occasions in case of extreme climate events.
Body
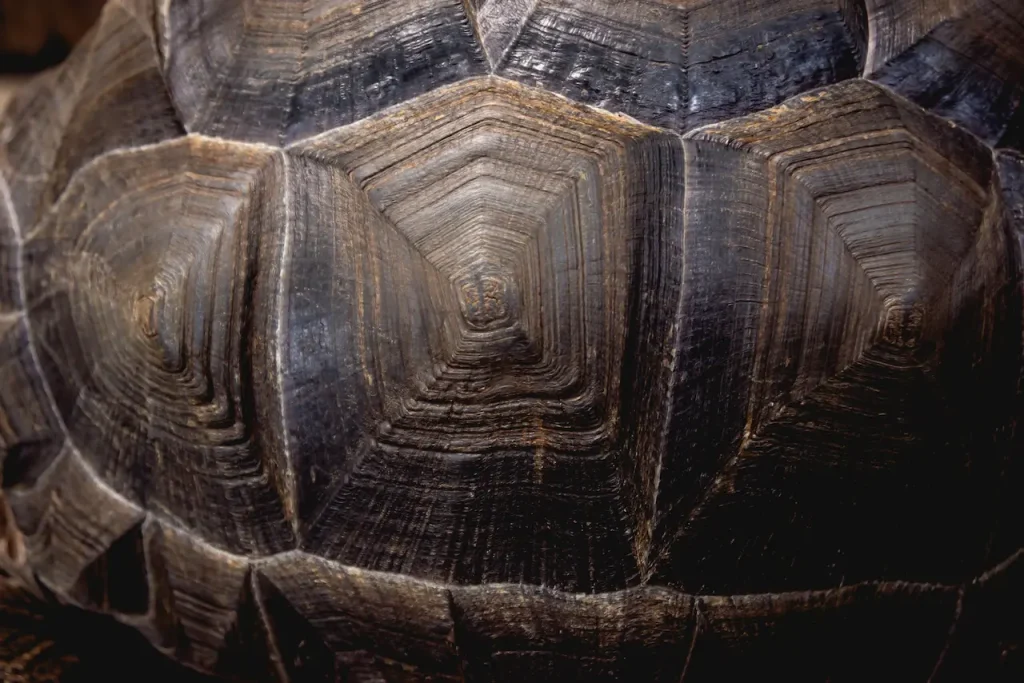
The Coahuilan Box Turtle is the only aquatic species of a box turtle in the genus Terrapene. As such their bodies have adapted to accommodate the long periods they spend in water. It is as earlier mentioned not uncommon to find algae growing on the exterior of their shell.
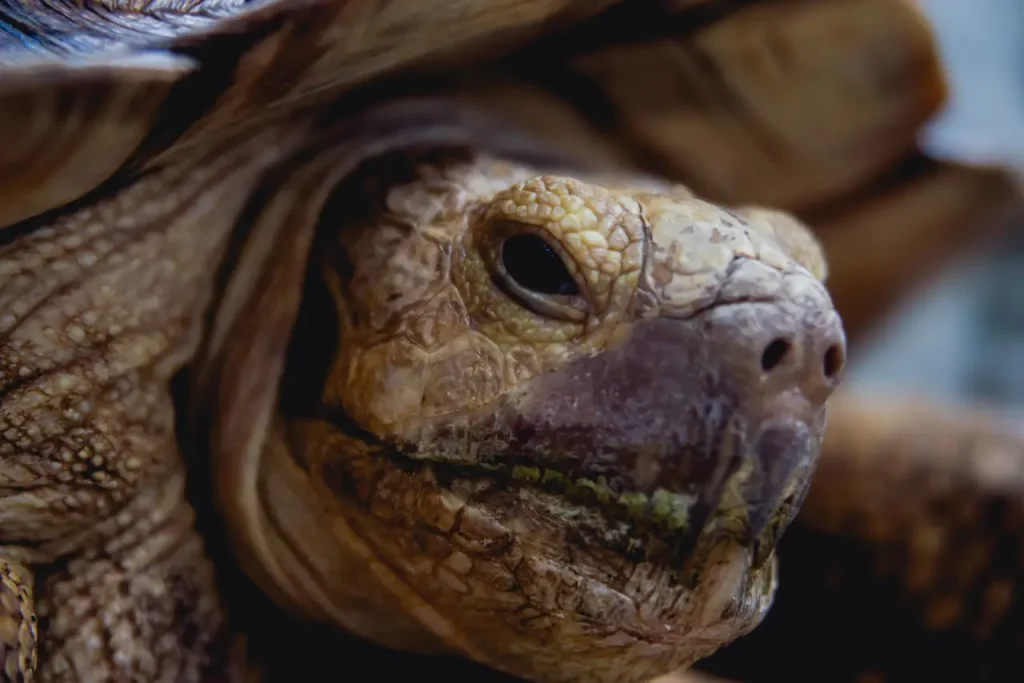
As with all box turtles, their shell is hinged and they can enclose themselves in it entirely when they feel threatened. Their skin has dark colours, such as deep browns or greys and can in some cases even appear black.
Sexing a Coahuilan Box Turtle
It can be hard to test this species. A trick that can be used to have sex with most box turtles is to look at their lower shell. The male’s lower shell has a concave curve to it so that it can mount the female turtle. A female’s lower shell is flatter by comparison.
In the wild the Coahuilan Box Turtle mate from September to June. Matings are usually most frequent during the spring months. They mate in shallow water. Egg laying takes place between May and September. Most clutches contain 2-3 eggs. About half of all females lay a second clutch of eggs later in the year and about 33% of all females lay a third clutch. Females producing three clutches produce an average of 6.8 eggs per season. This gives these turtles a higher reproductive potential than some of the northern species. It also might allow this species to bounce back quickly if good habitat protection and recreation is put in place
What Does a Coahuilan Box Turtle Eat?
The Coahuilan Box Turtle is an omnivore, meaning it eats both meat and plant matter. All box turtles tend to go for insects for their meat and protein, as these small targets are the easiest, most available prey. Their targets are often found in or near water, where the Aquatic Box Turtle spends most of its time.
In the wild Terrapene coahuila is an opportunistic feeder with a diet consisting of 50.7% insects (stratiomyid fly larvae, beetles, hemipterans, dragonfly nymphs) and 45.7% plant matter (Mostly Eleocharis). (Brown 1974) The remainder of their diet can vary but usually consist of small reptiles, crayfish and fish.
How Old Can a Coahuilan Box Turtle Get?
The exact lifespan of the Coahuilan Box Turtle is not known. Reports say anywhere from 9 to 18 years while other box turtles live up to 50 years.
Keeping Coahuilan / Aquatic Box Turtles as Pets
It is rare to find a Coahuilan box turtle in the pet trade. It is even rarer to find legal specimens. A large part of the specimens that make their way into the trade has been smuggled from Mexico. Coahuilan box turtle is often very expensive when it makes it onto the market.
The Coahuilan box turtle is listed on Appendix I of Cites and is federally listed as endangered under the Endangered Species Act. In many states, you will therefore need a federal permit to keep this species. In some states where the turtles are legally bred, you can buy them without a permit. Check with your local fish and wildlife administration before you get any box turtle species.
It would be desirable for this species to be bred in captivity to a greater extent so that captive-bred turtles could meet market demands and so that the captive population could be used as an assurance colony. This is especially true since the Coahuilan box turtle breeds rather easily in captivity and the high price they fetch on the market should make it more than worth the effort for a serious breeder to take it upon themselves to breed this species.
The Coahuilan Box Turtle is not suitable for the average pet owner. This species should only be kept by those who have to knowledge and facilities to keep the turtles happy and breeding.
Housing a Coahuilan Box Turtle
Constructing an artificial habitat for a Coahuilan Box Turtle is something best left to professional wildlife preservers and experienced hobbyist breeders who have a well-established record with other species.
Below you will be able to read some basic information on how to set up a suitable habitat for Coahuilan Box Turtles. The setup described below is designed to mimic the environment they encounter in the wild. I strongly recommend that anyone who wants to keep and breed this species talk directly to people who have kept and bred this species to get some extra tips on how they set up their habitats to get the turtles to thrive and breed.
We would also like to recommend everyone to read:
Ecology of the aquatic box turtle, Terrapene coahuila (Chelonia, Emydidae) in northern Mexico (Bulletin of the Florida Natural Museum Biological Sciences Volume 19, 1974, Number 1) by William S Brown.
The paper should be available through a local library or you can read it online here. It might be almost 40 years old but remains one of the best sources for information about Terrapene coahuila in their natural habitat.
The most important part of setting up a habitat for a Coahuilan box turtle is the aquatic section. The aquatic section should be large enough to give the turtles plenty of space to move around. The aquatic section should ideally contain a log they can hide under and plenty of plants. Eleocharis is an important part of their diet in the wild and a widely available aquarium plant that grows quickly in aquariums. I, therefore, recommend using a lot of Eleocharis in the setup and keeping an aquarium or pond running for growing Eleocharis that can be used to replace the plants being eaten by the turtles. If you do not want to breed your own Eleocharis you can buy it cheaply at a local fish store or negotiate to buy it from an aquarist who has more than he knows what to do with (from weekly trimmings). Water hyacinth is also a highly appreciated plant that will provide both shelter and will serve as food. They appreciate a mud bottom but this can be hard to provide as it makes the habitat harder to clean. If you use Eleocharis in the setup you will need to use a bottom substrate. Eleocharis grows well in mud but regular aquarium gravel will also work. The plants will grow a little bit slower in gravel.
The habitat should preferably be placed in a greenhouse or in front of a window made out of a UV-penetrable material. Ideally, it should allow at least 80% of the UV rays to penetrate down to the habitat. If this is not possible an artificial UV light source needs to be provided.
The terrestrial area of the habitat does not need to be big but should provide areas that are sheltered under plants as well as a nesting area.
Feeding a Terrapene coahuila
Terrapene coahuila should be fed a varied diet consisting of equal parts vegetable and meaty food. If the above setup is used that provide the turtles with a steady supply of Eleocharis than that will provide a large part of their vegetable needs. I do however still recommend giving them other vegetables and fruits a few times a week to make sure they get all the vitamins and minerals they need. Sliced bananas are an easy-to-use and often appreciated complement tp their diet.
The meaty part of the diet can be provided in the form of insects such as snails, earthworms and crickets. Avoid meal worms as they have been associated with some potential health concerns that although they are very rare remain a cause for concern. If you for whatever reason are unable to provide them with insects at a certain point in time than frozen and thawed shrimps can be a good substitute. The shrimp are high in protein and the turtles will usually happily eat them. Buy natural shrimps not shrimps that have been treated or frozen in a shrimp brine. I prefer using de-shelled shrimps when feeding turtles but I do know that some prefer to feed shrimp with the shell still on them to provide the turtles with the nutrients in the shell. I think this constitutes an unnecessary risk but can be worth considering in turtles that have shell-related problems and therefore can benefit more than the healthy turtle from the nutrients in the shell.
References
- Brown, W. S. 1971. Morphometrics of Terrapene coahuila (Chelonia, Emydade), with comments on its evolutionary status. The Southwestern Naturalist. 16 (2): 171-184.
- Brown, W. S. 1974. Ecology of the aquatic box turtle Terrapene coahuila (Chelonia, Emydade), with comments on its evolutionary status. Bulletin of the Florida State Museum. 19 (1): 1-67
- Feldman, C. R. y Parham, J. F. 2002. Molecular phylogenetics of emydine turtles: taxonomic revision and the evolution of shell kinesis. Molecular Phylogenetics and Evolution. 22 (3) : 388-398.
- Stephens, P.R. and J.J. Wiens. 2003. Ecological diversification and phylogeny of emydid turtles. Biological Journal of the Linnean Society 79: 557-610
- Howeth, J. G., McGaugh, S. E., Siegrist, J. W. y Hendrickson, D. A. Spanning biogeographic range boundaries: morphological and demographic patterns in peripheral versus core populations of Terrapene coahuila [en línea] Estados Unidos http://www.desertfishes.org/cuatroc/meeting/junta/2004/congreso/Memorias_junta2004_res_alta.pdf
- Howeth, J.G. and Brown, W.S. 2011. Terrapene coahuila Schmidt and Owens 1944 – Coahuilan Box Turtle. In: Rhodin, A.G.J., Pritchard, P.C.H., van Dijk, P.P., Saumure, R.A., Buhlmann, K.A., Iverson, J.B., and Mittermeier, R.A. (Eds.). Conservation Biology of Freshwater Turtles and Tortoises: A Compilation Project of the IUCN/SSC Tortoise and Freshwater Turtle Specialist Group. Chelonian Research Monographs No. 5, pp. 049.1–049.13, doi:10.3854/crm.5.049.coahuila.v1.2011, https://iucn-tftsg.org/cbftt/
- Howeth, J.G.; McGaugh, S.E. & Hendrickson, D.A. 2008. Contrasting demographic and genetic estimates of dispersal in the endangered Coahuilan box turtle: a contemporary approach to conservation. Molecular Ecology 17: 4209–4221.